How to Create a Gitspace
Make sure you have latest version of gitness installed that includes the Gitspace offering and it's docker.io/harness/gitness:latest.
How to Create a Gitspace
-
Login to Gitness, and create a new project. You will see Gitspace available in the sidenav.
-
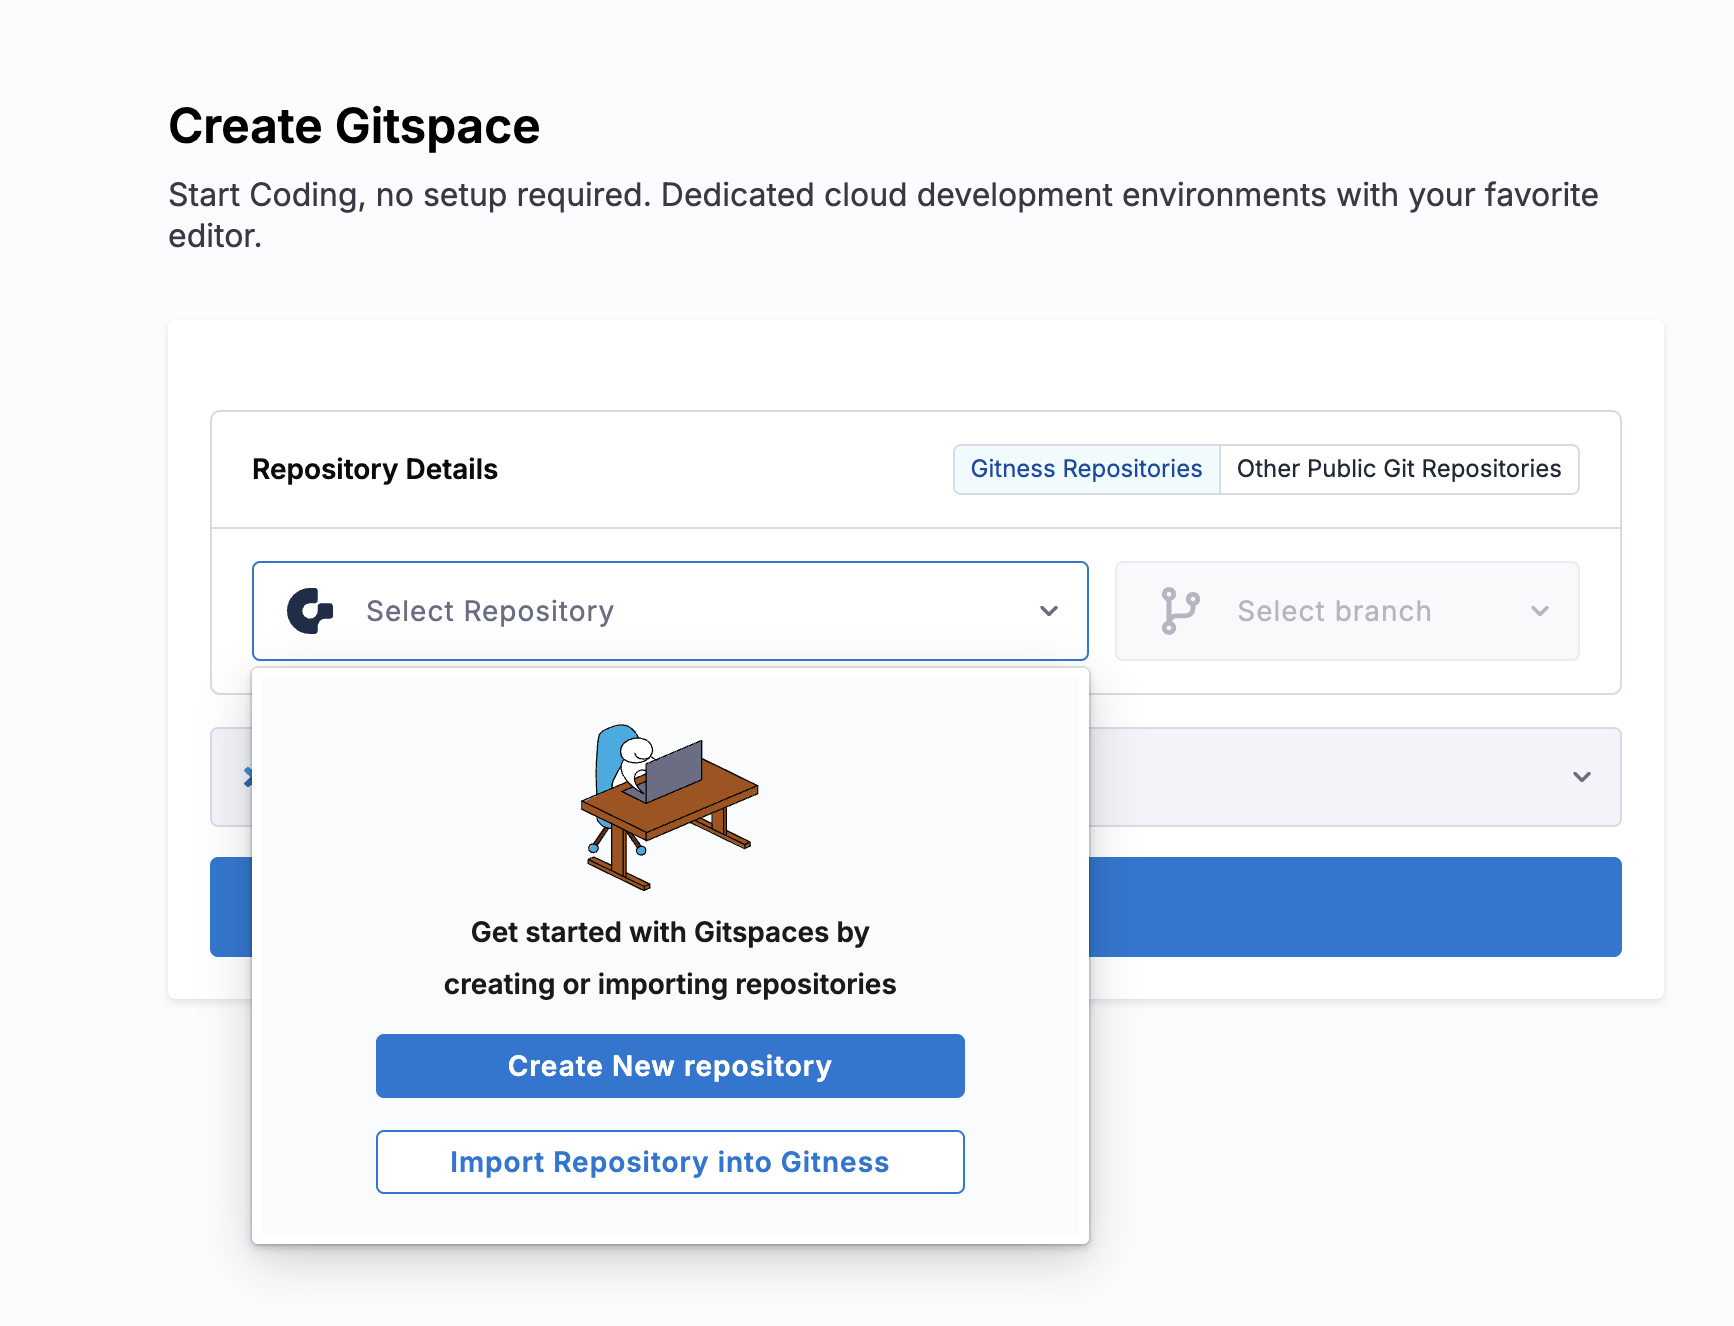
Click on +New Gitspace. To create a Gitspace using the sample app. You have two options to create Gitspace:
- Using Gitness Repositories
- Other Public Git Repositories
- If you don’t have a Gitness Repository, you’ll get an option to create one or import a new repository.
-
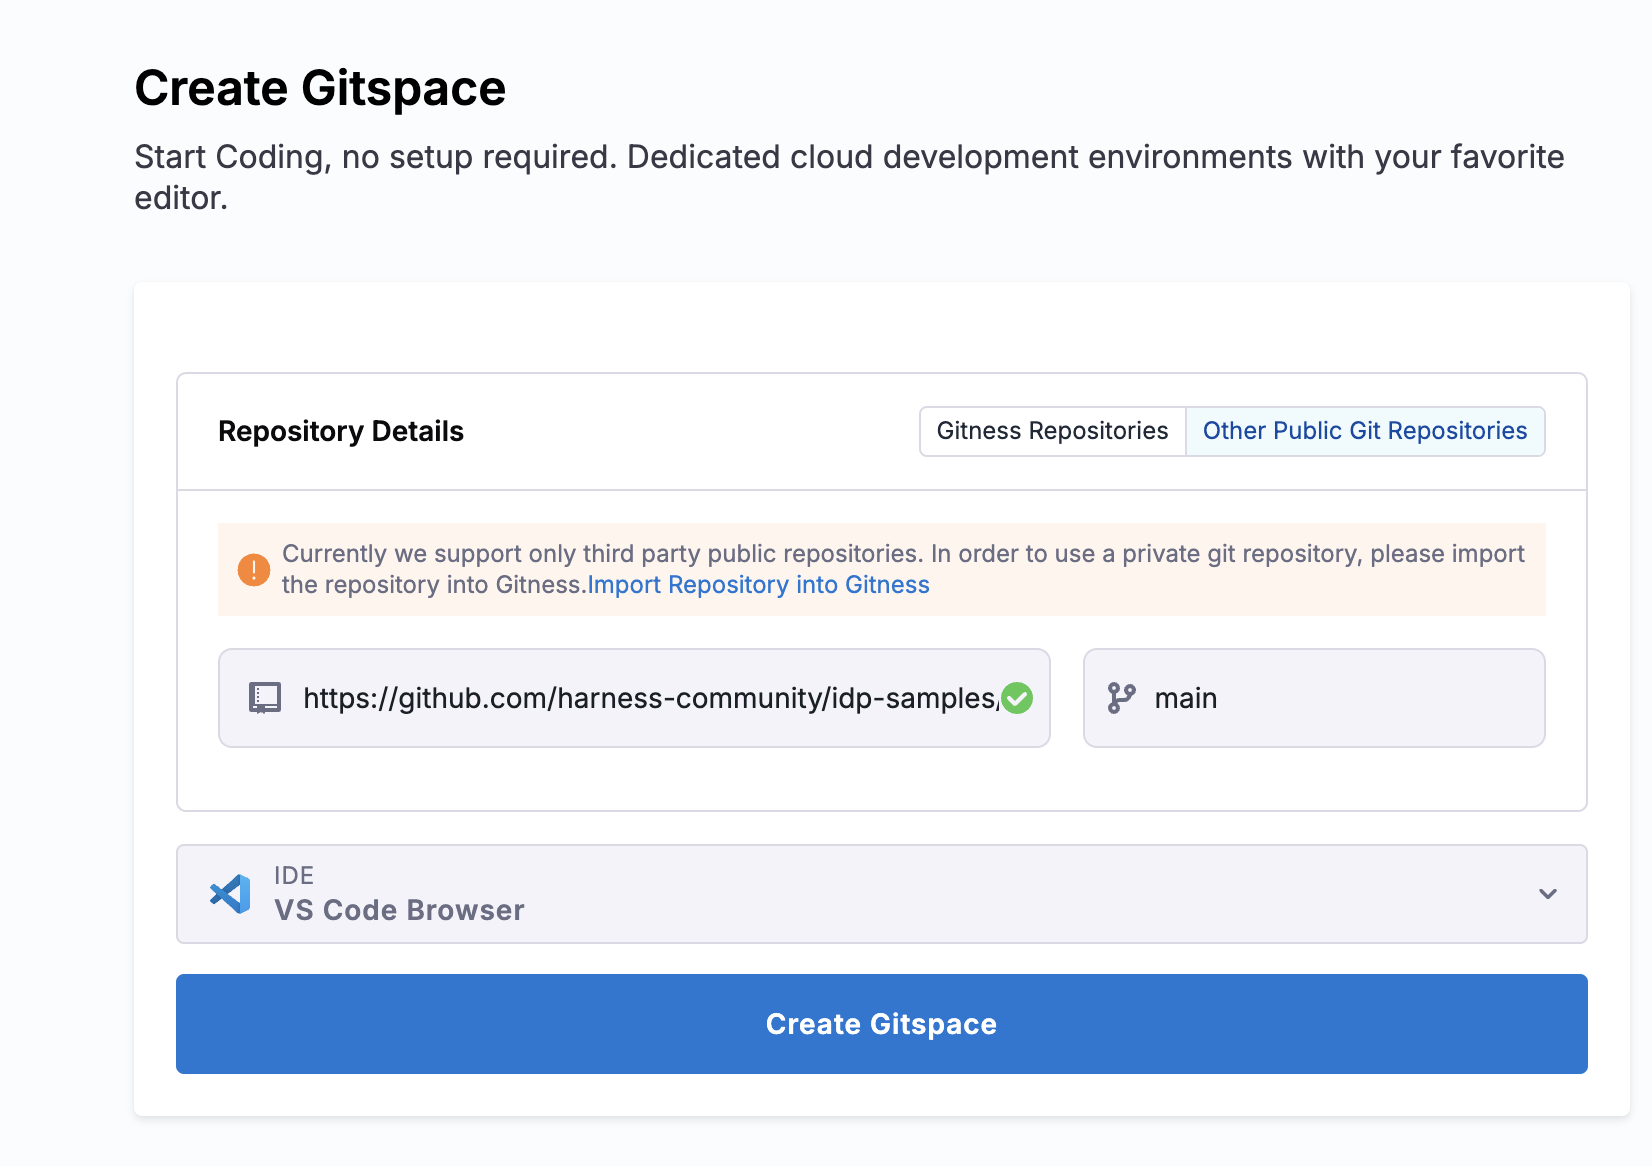
Once the repository is available, you can select the branch and the IDE type (VSCode Browser and Desktop are supported)
-
Import the repository from third party git provider to Gitness, using the organization and the repository name. Read for more details
-
Now Create Gitspace, by selecting the default branch as
mainand IDE.
-
Repository URL is
https://github.com/harness-community/demo-repo-nm(enter URL of your fork if you forked it), make sure the URL is the clone URL strictly of the formathttps://git-provider.com/organisation/repositoryany extra string post this might cause an error. -
Let the branch be default
main, select the IDE and Create Gitspace.
- VS Code Browser
- VS Code Desktop
- VS Code Browser can directly be started on your browser and doesn't require any pre-configuration.
- You can select the IDE type as VS Code Browser and you'll redirected to the IDE on a new tab once the Gitspace is created and you click on Open VS Code Editor.
VS Code Desktop
-
You can install and configure the Gitspace VS Code extension to use it on your VS Code Desktop App.
-
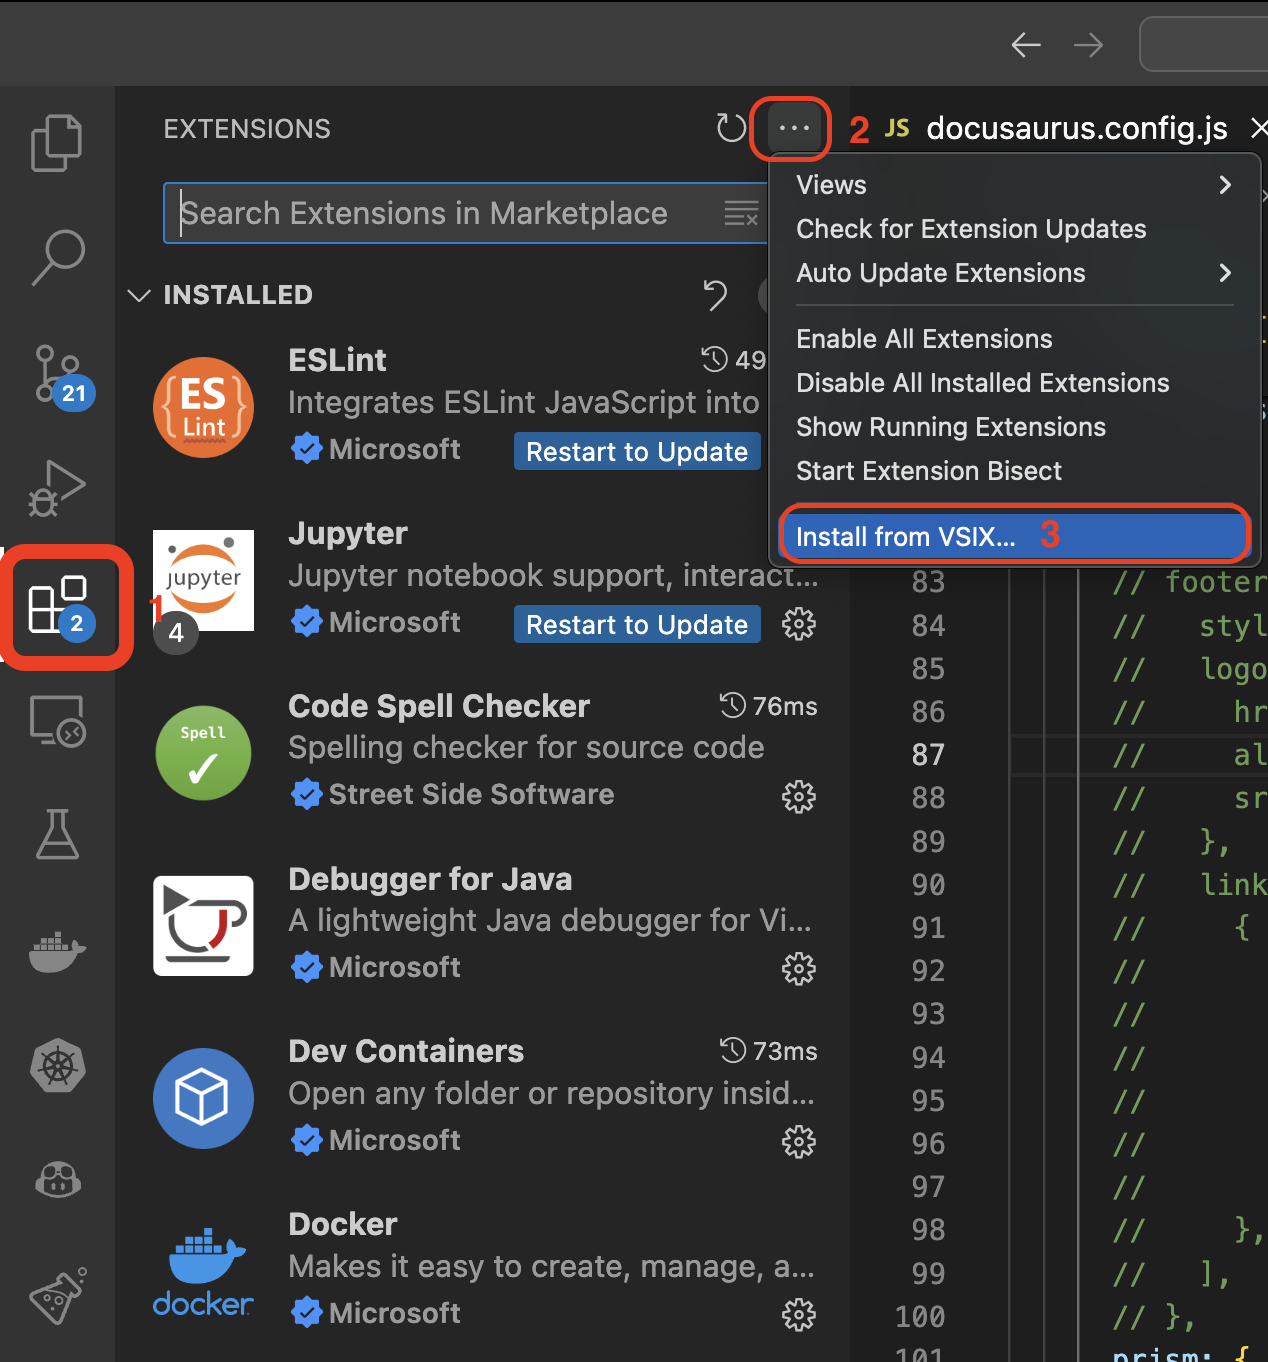
Download the Vsix file for the Gitspace extension.
-
Install the extension using vsix under the extensions tab in VS Code Desktop.
-
The extension will appear on the left nav of your screen, click on continue for Sign-in.
-
On the configuration page click on the Gitspace dropdown on the leftnav and select Gitness.
-
Add the Gitness Service URL, which is the host where Gitness is running, for eg:,
http://34.145.58.210. Make sure you do not have a/at the end of the URL. If you have installed Gitness on your local machine, the URL ishttp://localhost:<port>
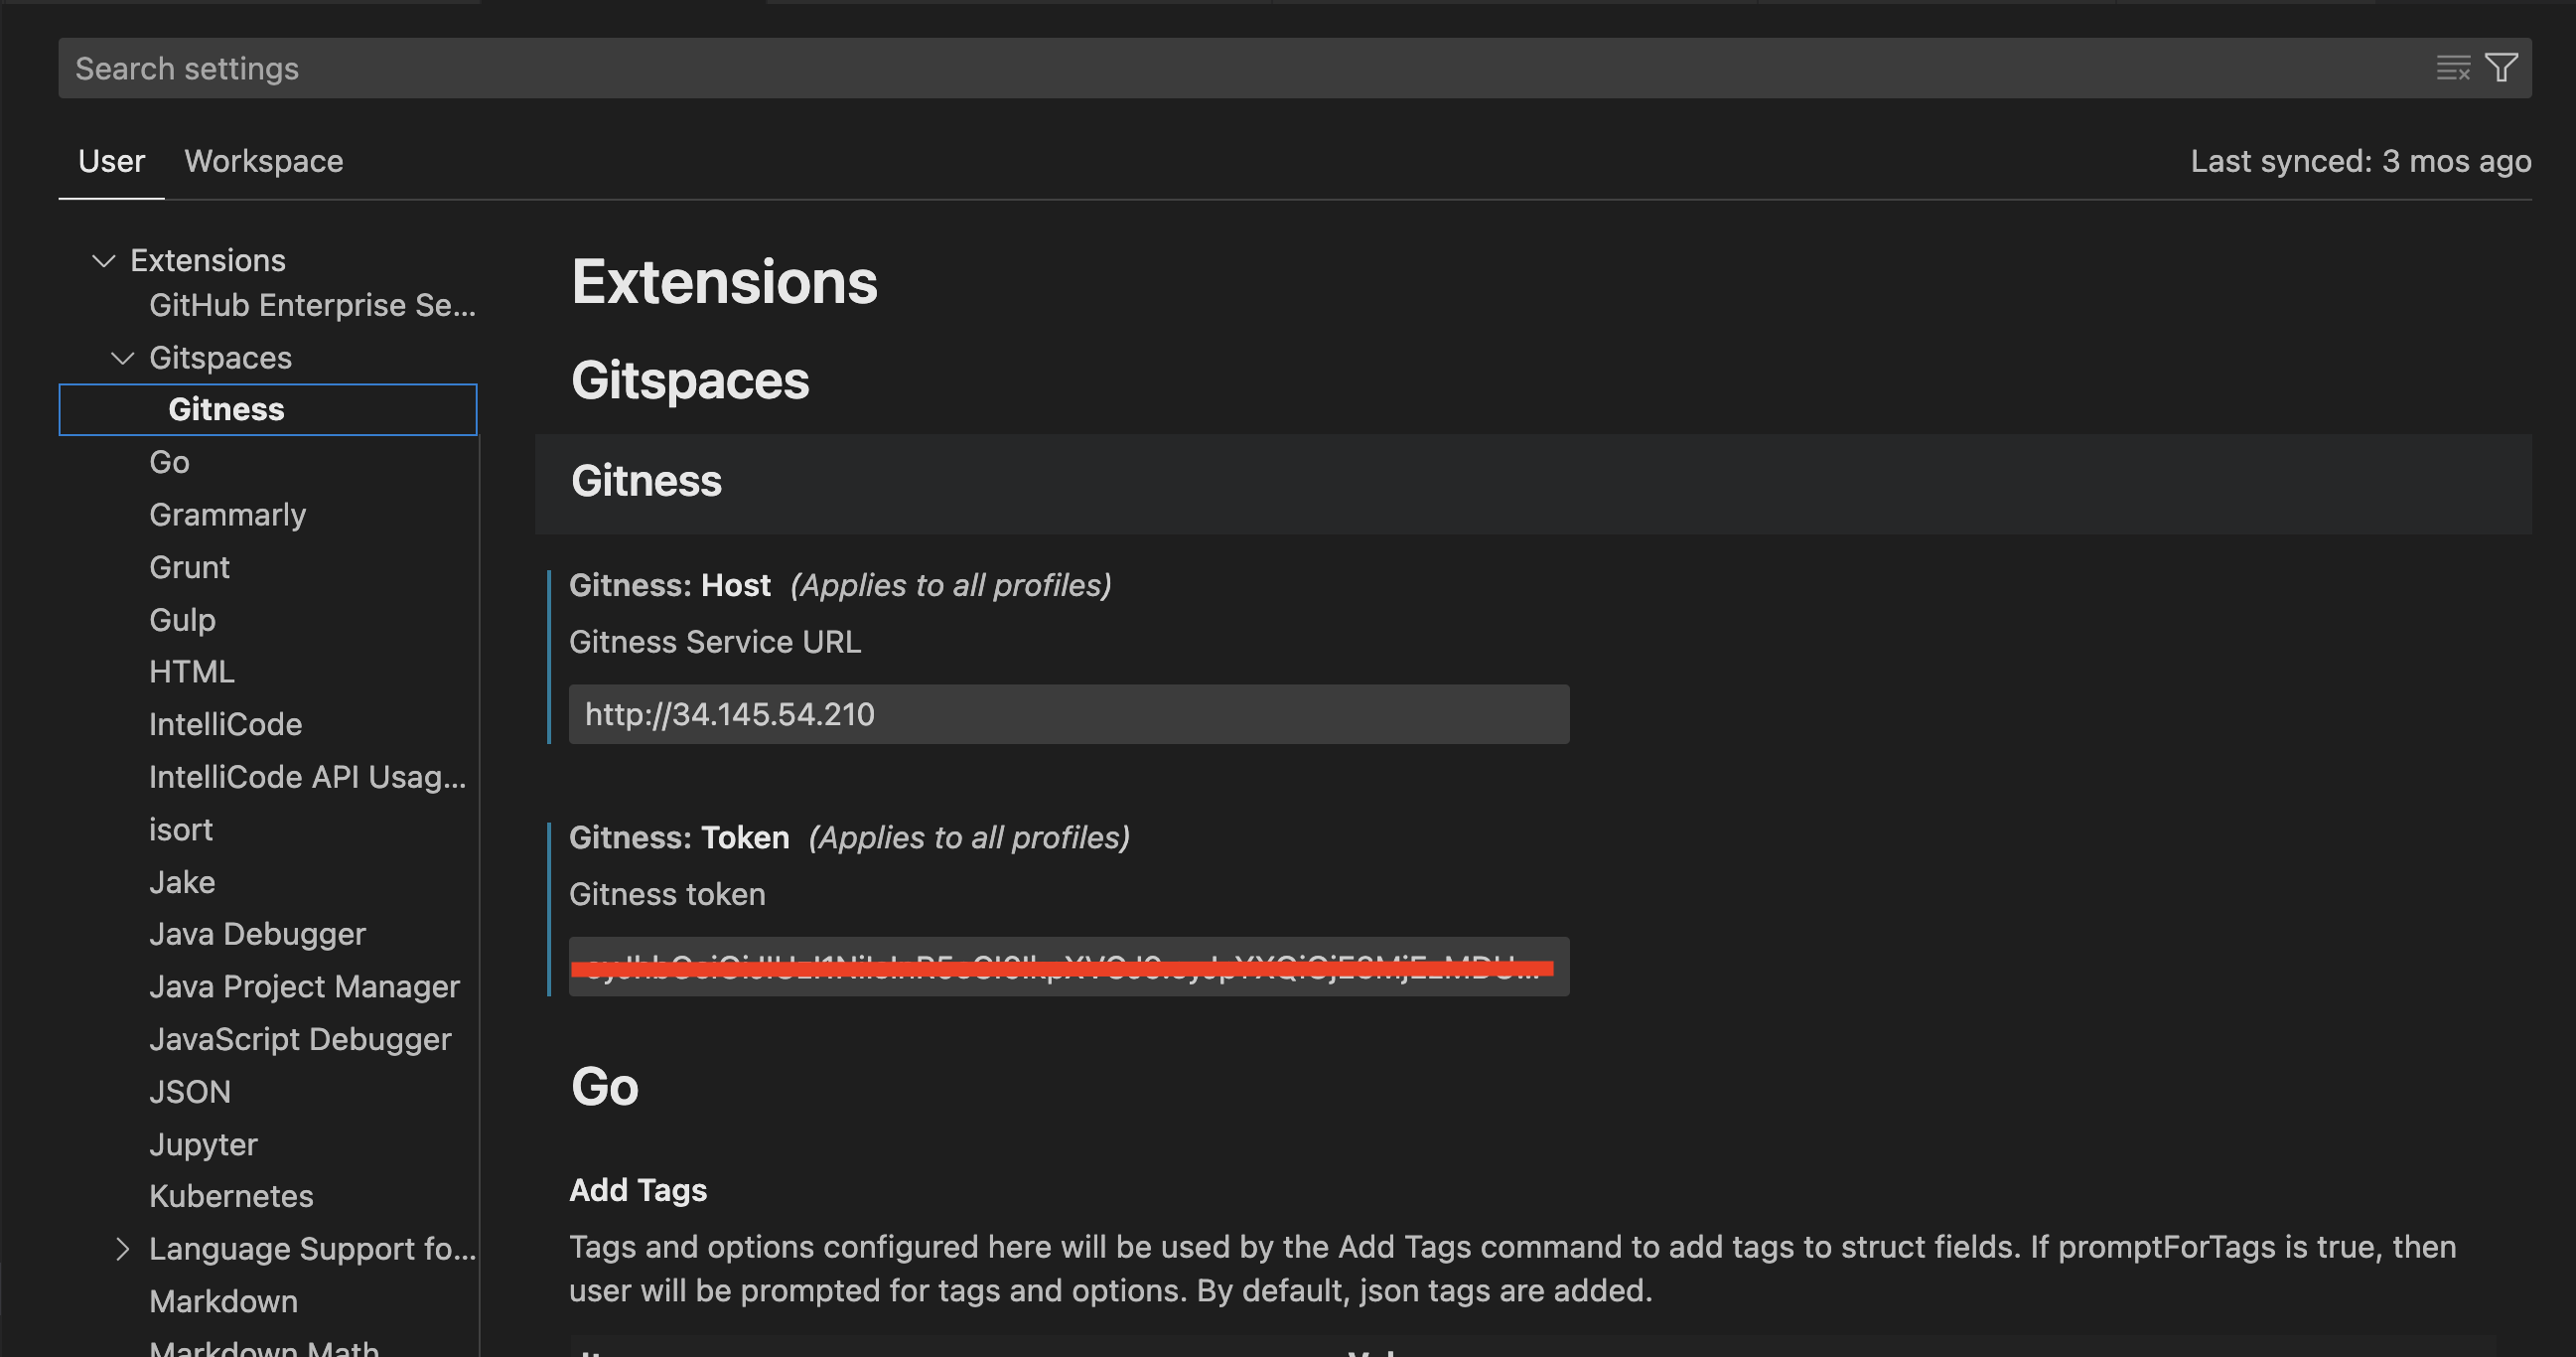
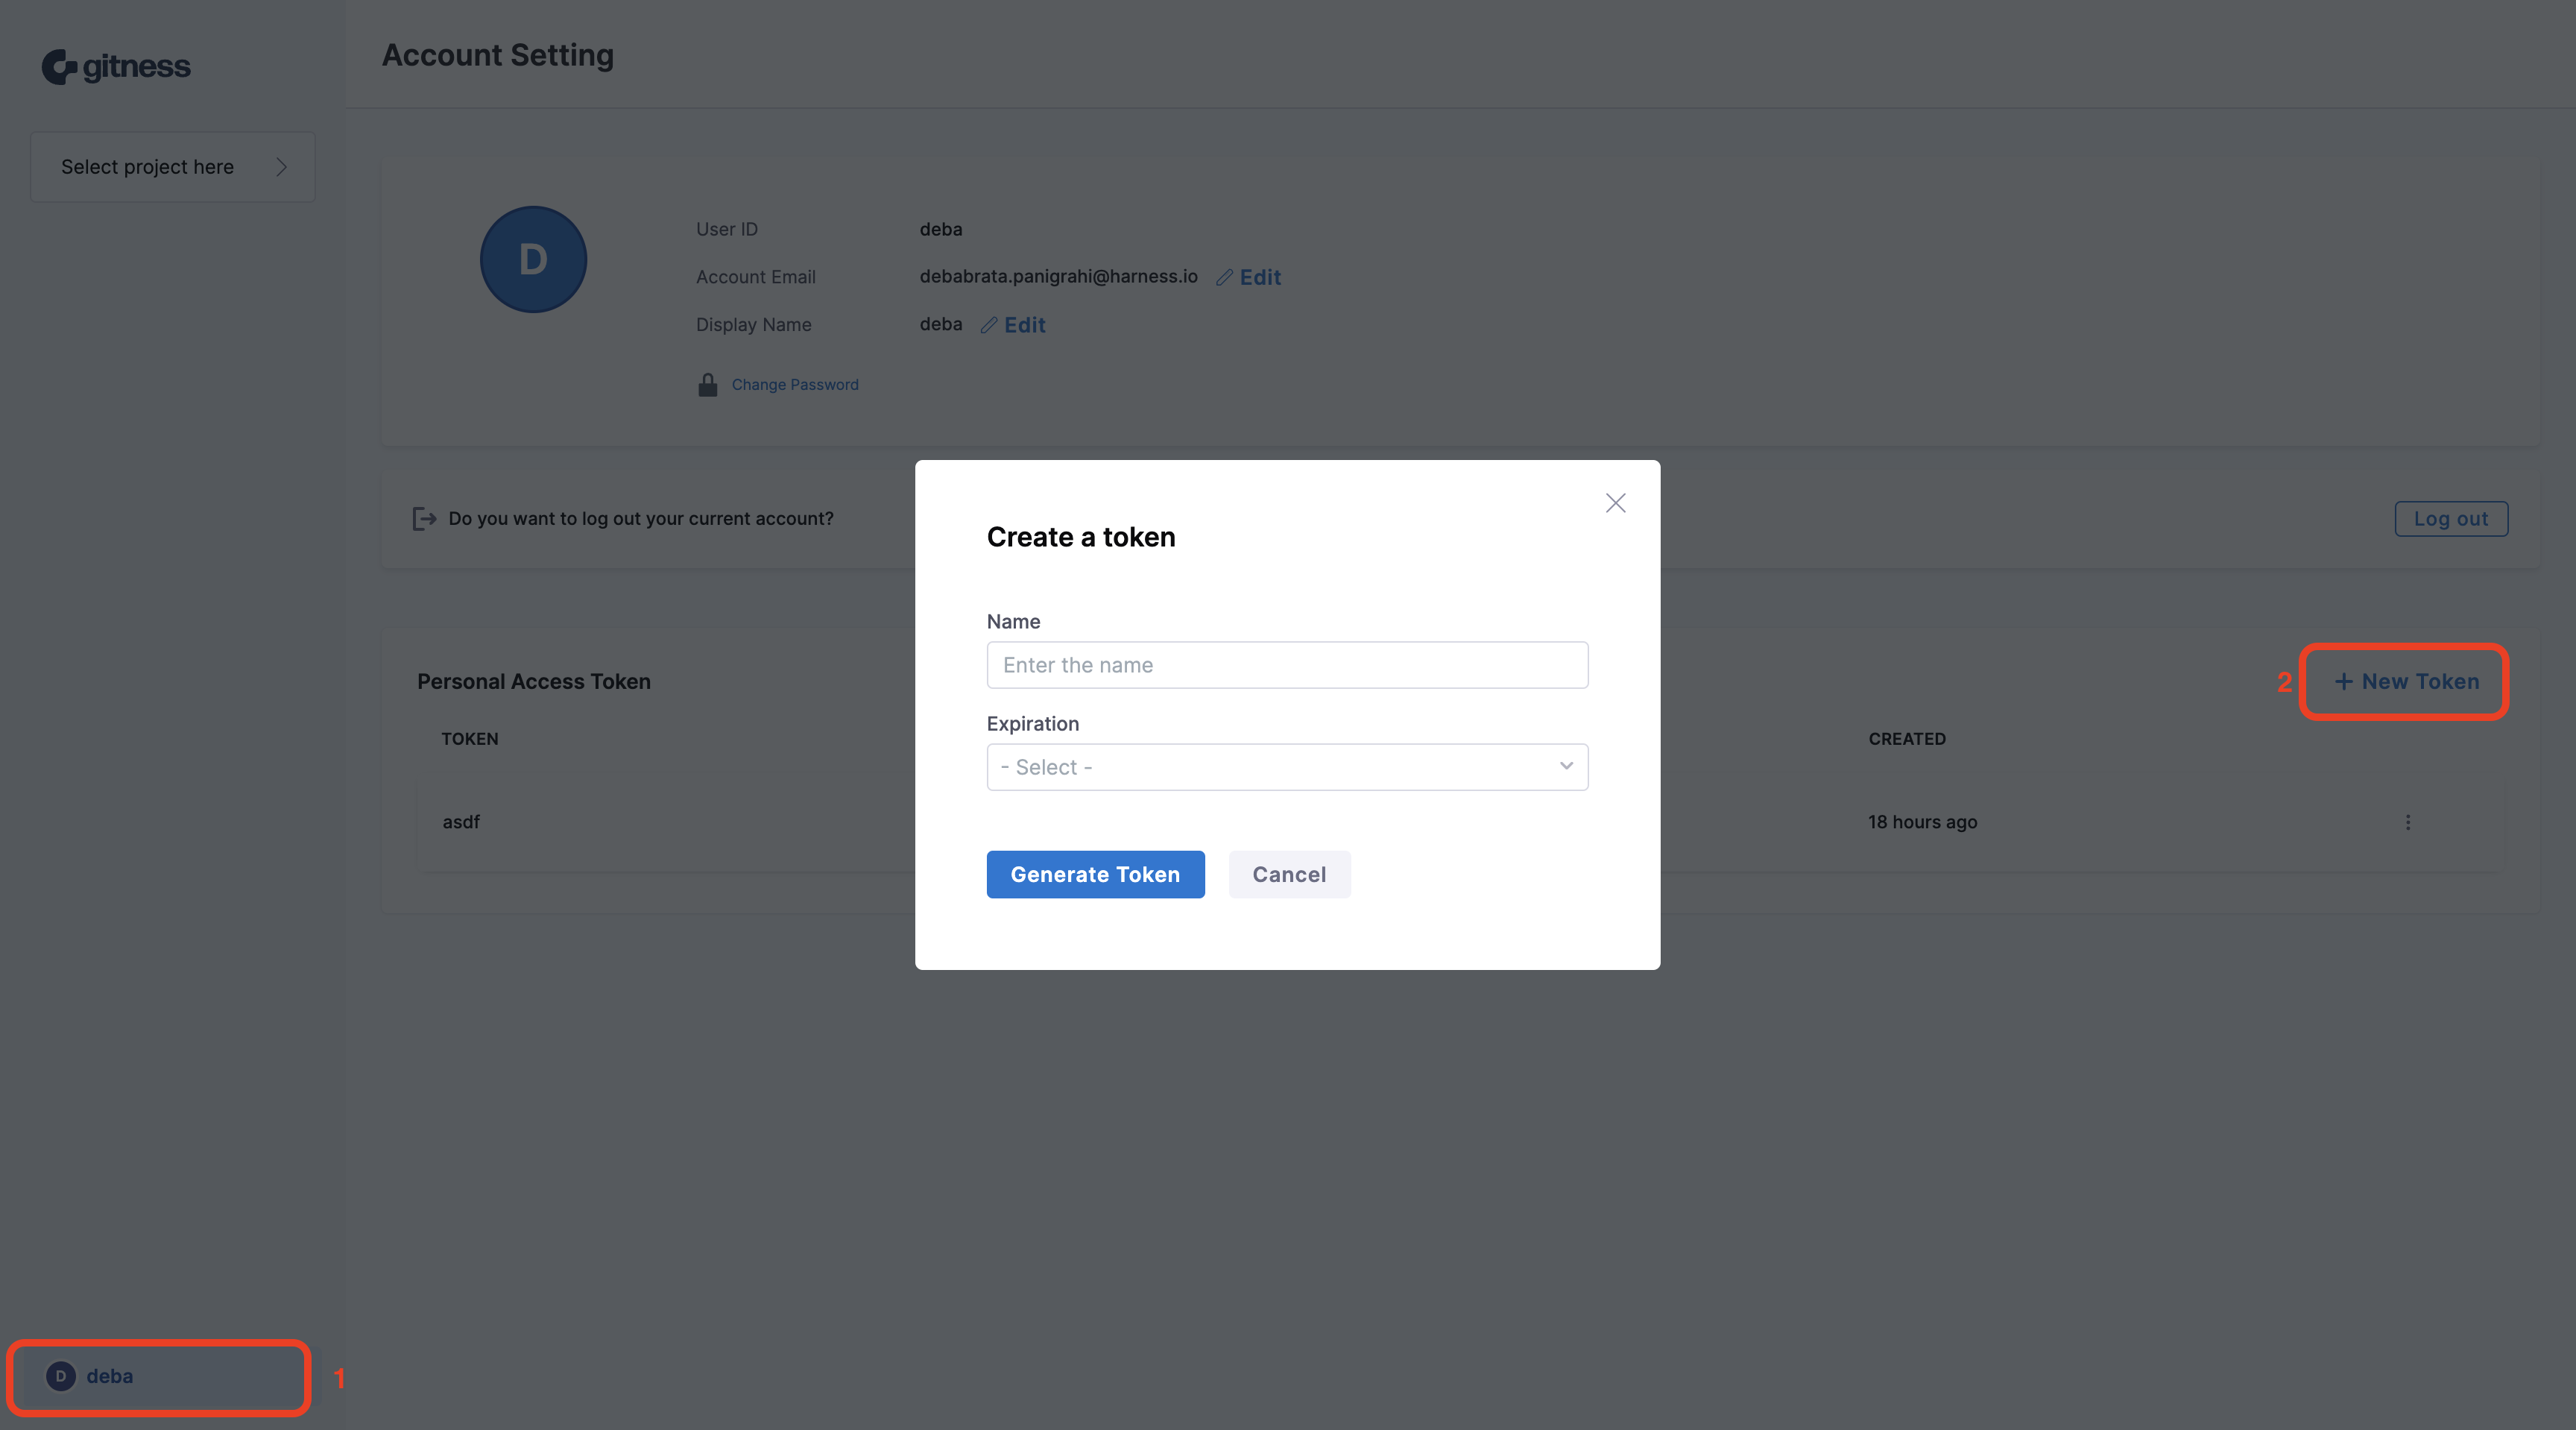
- For the Token, go to your user profile on Gitness and generate one.
- Save the configuration.
-
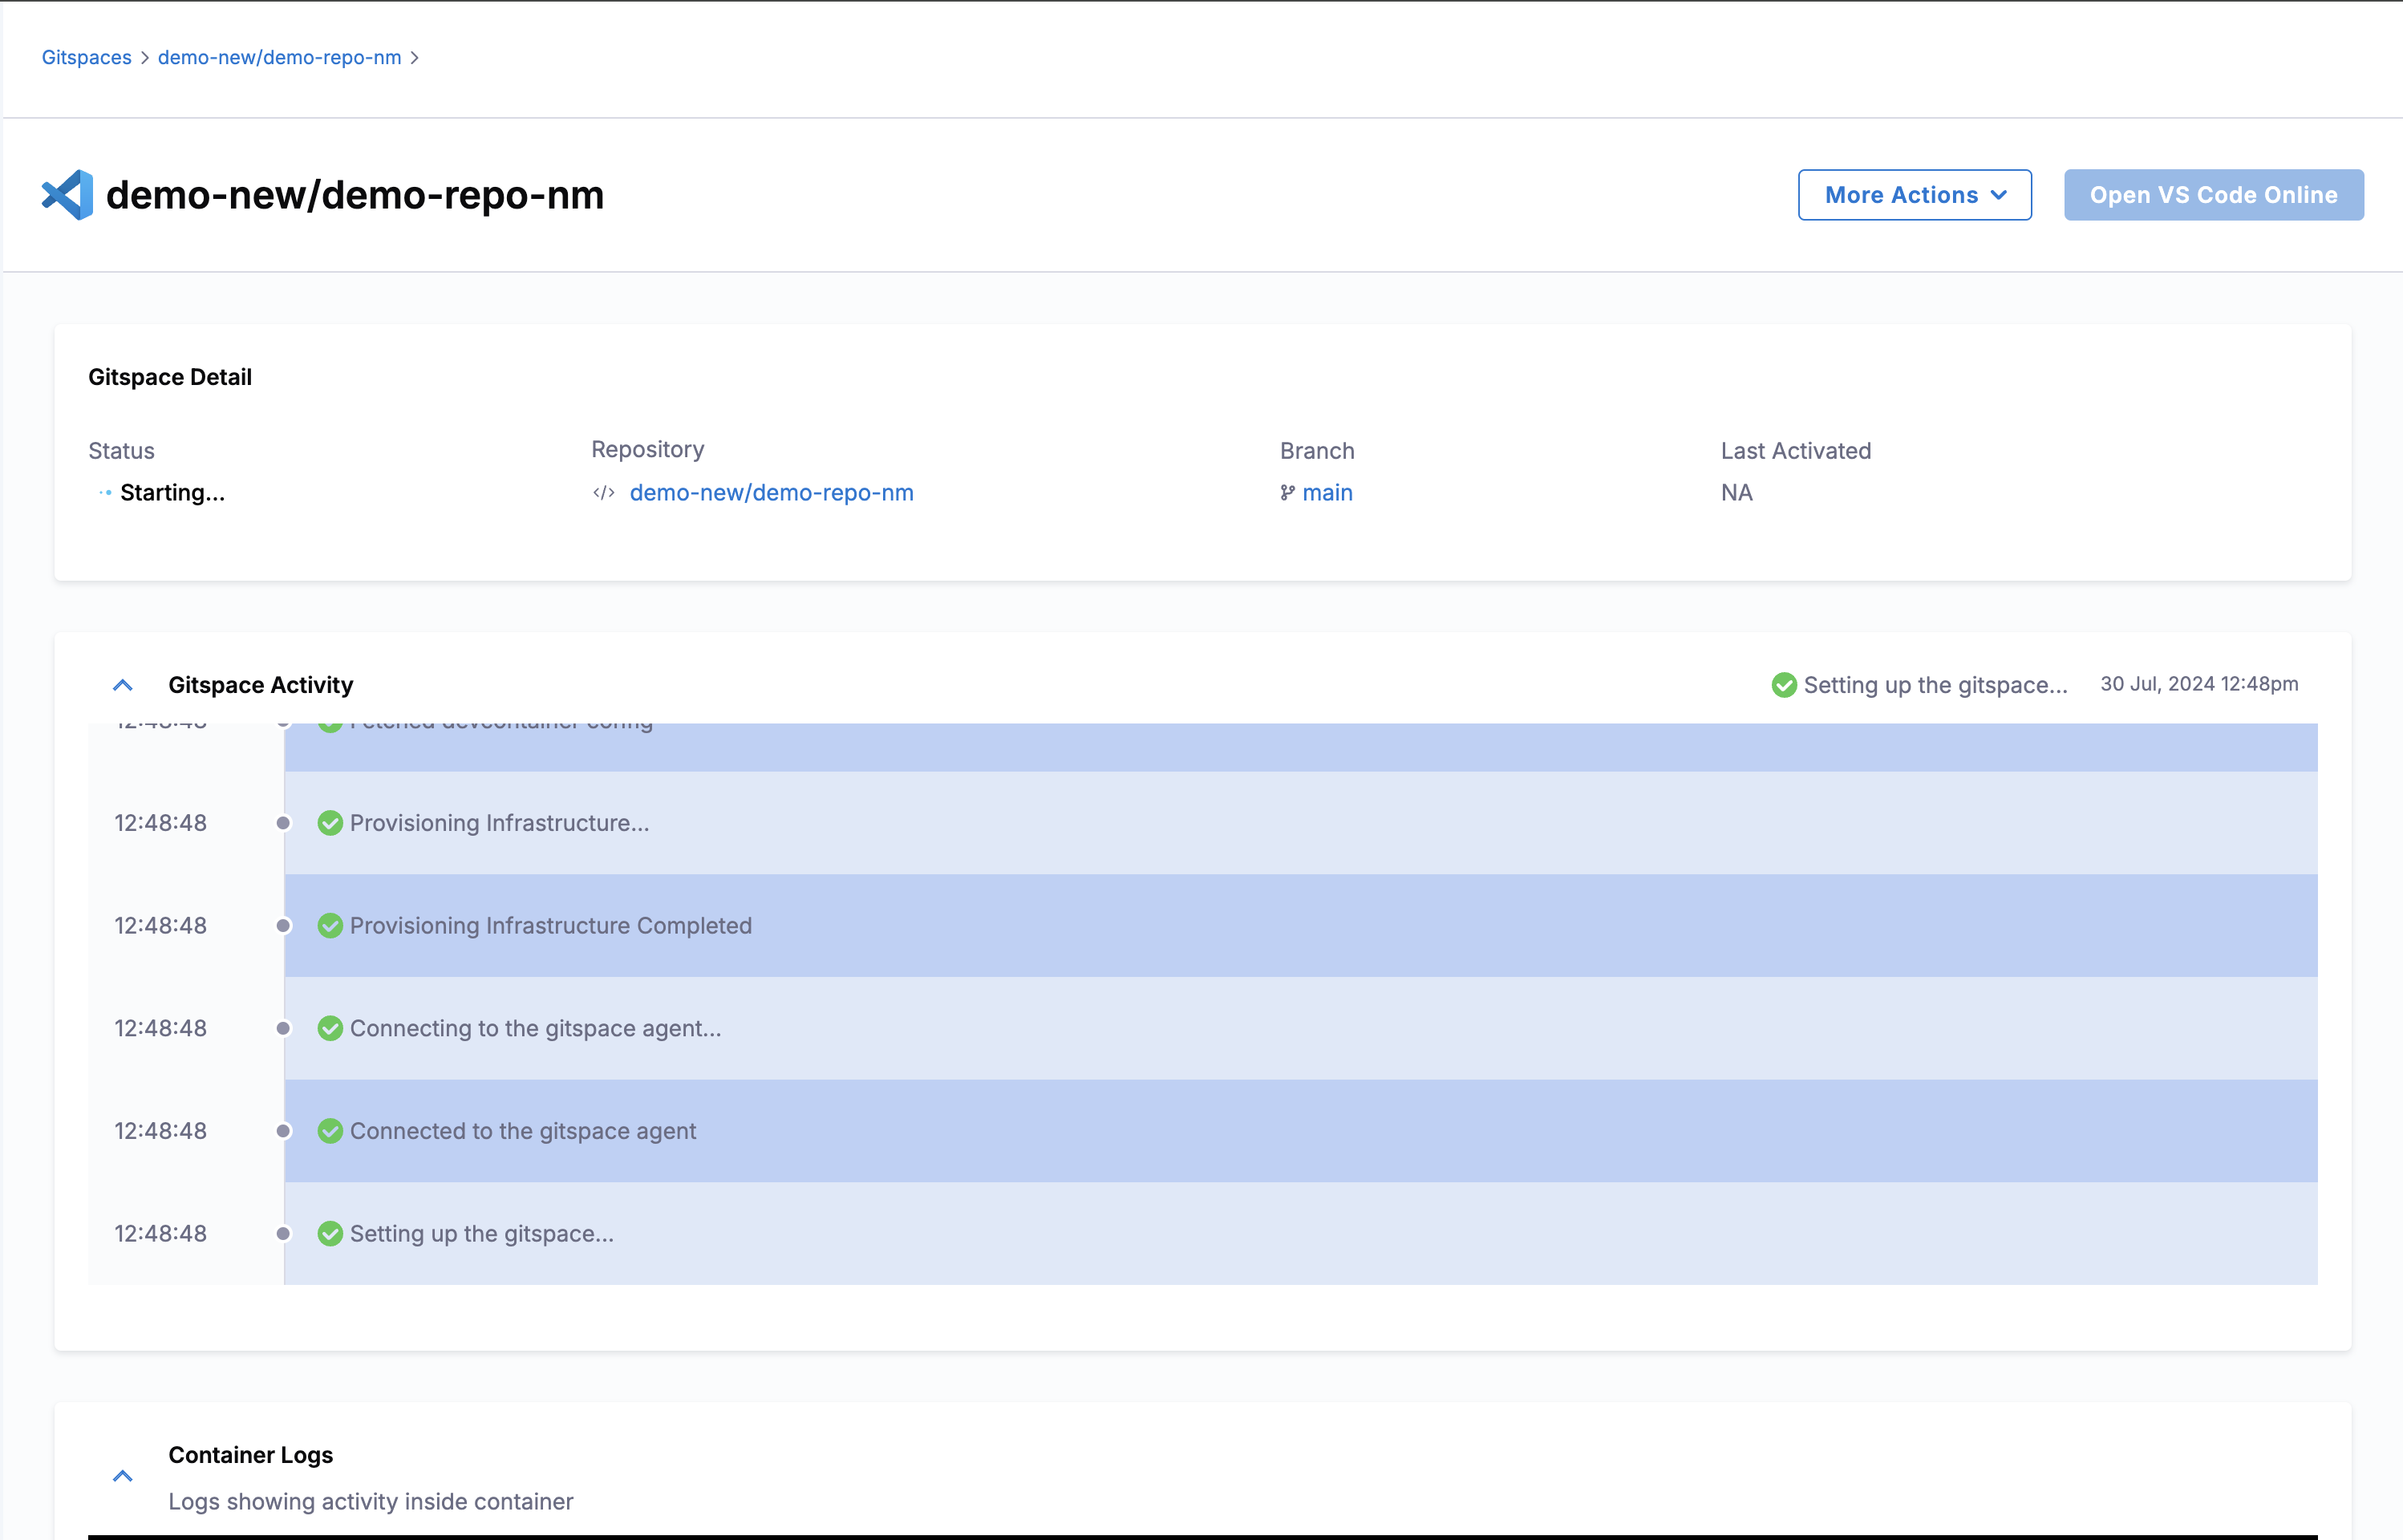
It will take few minutes to provision the Gitspace and you could see all the steps and logs involved.
-
Now you can Open VS Code Editor.